


Want a durable, eye-catching custom marker without wasting money on something that fades by the fifth round? Metal coins and resin-inlay designs win on durability and polish; repurposed objects like bottle caps and washers win on cost and novelty; magnetic hat-clip markers win on convenience. Everything else below is detail, technique, and rules.
TL;DR:
- Metal coins and resin-inlay markers offer the highest durability and polish, with resin inlays requiring careful bubble removal for clarity.
- For long-lasting custom markers, selecting materials like stainless steel or titanium and sealing painted surfaces with epoxy extends lifespan beyond a year of play.
- Magnetic markers and clips must be matched for weight and magnet strength to prevent markers from dropping during a round.
- Ordering pre-made markers ensures consistent quality, with options like hard enamel and UV printing providing detailed and weather-resistant designs.
- Markers are legally permitted in golf if used solely to mark the ball’s position without aiding alignment, emphasizing quick placement and removal.
Table of Contents
- What Are the Best Custom Ball Marker Ideas?
- DIY Custom Marker Ideas and Step-by-Step Methods
- Ready-Made and Custom Ordering Options
- Materials, Finishes, and Durability Trade-Offs
- Functional Design Constraints and Compatibility Checklist
- Occasions, Gift Ideas, and Packaging Suggestions
- Are Custom Ball Markers Legal to Use in Golf?
- Why Magnetic Compatibility Changes How You Design a Marker
- Get a Custom Marker That’s Built for the Course, Not Just the Desk
- Sources
What Are the Best Custom Ball Marker Ideas?
Picking a direction is easier once you separate markers by what they’re actually built for: showing off, surviving years of play, or costing next to nothing. Here’s a fast reference before diving into the how-to sections.
- Metal coin markers — best for a premium feel; needs a blank metal disc, engraving or UV printing, and a clear sealant.
- Resin-inlay markers — best for showing off photos, logos, or glitter; needs a mold, slow-curing epoxy, and patience.
- Painted and epoxy-sealed coins — best for a budget-friendly custom look; needs acrylic paint, a fine brush, and clear epoxy.
- Bottle caps and washers — best for a novelty gift under $5; needs a flattened cap or steel washer and adhesive vinyl.
- Cork slices and guitar picks — best for a rustic or musical theme; needs a thin slice or blank pick and a marker or wood-burner.
- Poker chip markers — best for a bold, easy-to-spot design; needs a standard chip and a paint pen or sticker.
- Magnetic hat-clip markers — best for pace of play and one-hand retrieval; needs a rated magnet and a compatible clip.
DIYers usually start with painted coins or bottle caps because the materials cost almost nothing. Golfers who want something that survives a decade of rounds tend to order metal or hard enamel instead of building it at home.
DIY Custom Marker Ideas and Step-by-Step Methods
Building your own marker isn’t complicated, but the difference between a marker that lasts one season and one that lasts ten comes down to prep and sealing.
Resin-inlay markers. Start with a shallow silicone mold sized to standard marker dimensions, usually around 1 inch across. Place your photo, initials, or a pinch of glitter face down in the mold, then pour a slow-curing two-part epoxy over it. A slow cure gives trapped air time to escape on its own, and a light pass with a small vacuum chamber or even a toothpick to pop bubbles at the surface makes a visible difference in clarity. Let it cure fully, usually 24 to 72 hours depending on the product, before popping it out and gluing it to a flat metal or plastic base.
Painted and epoxy-coated coins. Sand the coin’s face lightly so paint has something to grip, wipe off the dust, and apply two thin coats of acrylic paint rather than one thick one. Once dry, seal the design with a clear two-part epoxy or, for a faster alternative, a few light coats of clear polyurethane spray. Epoxy and other resin coatings are the standard recommendation here because they waterproof the design and protect the artwork from scuffing and UV fading over time.
Bottle caps, corks, and washers. Flatten a bottle cap with a hammer or mallet, then treat it exactly like a coin: paint, seal, done. Cork slices take a wood-burner or fine permanent marker well and only need a matte spray sealant. Steel washers from a hardware store make surprisingly solid blanks. They’re already flat, already the right weight, and take vinyl decals or paint just as easily as a purpose-made blank.
- Flat metal blanks, craft coins, or washers (starting base)
- Fine sandpaper (220 grit or higher) for surface prep
- Acrylic paint or UV-resistant vinyl decals
- Two-part epoxy or clear polyurethane spray sealant
- A shallow mold and slow-curing resin, if doing an inlay
The two most common failures are air bubbles trapped in resin and paint that peels because the surface wasn’t cleaned or roughed up first. Both are avoidable with patience rather than skill.
Pro Tip: Mod Podge works as a cheap first-layer sealant under your final epoxy coat, and it keeps decorative paper or photo inlays from bleeding or lifting once the resin goes on top.
Ready-Made and Custom Ordering Options
Ordering a marker instead of building one gets you consistency and detail a kitchen-table project can’t match, but the process you choose determines what you’re actually paying for.
Soft enamel uses recessed, hand-poured color separated by raised metal lines, giving a slightly textured, tactile finish. Hard enamel fills those same recesses flush with the surface, producing a smoother, glossier result that resists chipping better over time. Die-struck markers skip color almost entirely, relying on stamped metal detail and an oxidized or polished finish. UV printing applies full-color, photo-quality graphics directly onto a metal or acrylic base, which is the process to choose if you’re reproducing a detailed logo or an actual photograph. Epoxy-coated coins add a domed, glass-like protective layer over any of the above. Manufacturers regularly offer all of these processes side by side, and the choice usually comes down to budget, image complexity, and how much wear the marker needs to survive.
- Soft enamel: mid-range cost, good color depth, best for simple logos or initials
- Hard enamel: slightly higher cost, smoother and more durable finish
- Die-struck: lower cost, no color, best for classic monogram or crest designs
- UV printing: best for photos or gradient artwork; least abrasion-resistant without a sealant
- Poker-chip markers: cheap, bold, and easy to spot on the green
- Magnetic markers with hat clips: built for on-course convenience over pure looks
Extras like glow powder, glitter epoxy fill, spinner centers, and custom die-cut shapes are common add-on options worth asking about if you want something beyond a flat round disc. Retailers also sell pre-made personalized magnetic markers in small multi-packs, often printed with a photo, initials, or a logo, which is the fastest route if you don’t want to manage custom artwork at all. Send vector artwork if you have it, expect most custom runs to ship in one to three weeks, and check the minimum order quantity before assuming a single marker is even an option.
Materials, Finishes, and Durability Trade-Offs
Every material choice is really a trade-off between weight, cost, and how the marker feels in your hand after five years of pocket wear.
Brass feels substantial and takes engraving well, but it tarnishes without a protective coat. Stainless steel resists corrosion almost entirely and holds its shine longer than brass or zinc. Zinc alloy is the budget standard for die-struck markers, light and cheap but softer and more prone to scratching. Titanium costs more but shrugs off dings for a lifetime. Tungsten is dense and premium-feeling but rare outside novelty or weighted designs.
- Brass: warm tone, good detail retention, needs a sealant to resist tarnish
- Stainless steel: best all-around corrosion resistance for everyday carry
- Zinc alloy: cheapest option, fine for occasional use, weaker against scratches
- Titanium: premium durability, higher cost, minimal upkeep
- Tungsten: dense and heavy, best for novelty or collector pieces
On finishes, epoxy and polyurethane sealants are your two realistic options for protecting a painted or printed surface. Both are recommended specifically because they waterproof the design and shield it from sun exposure, which is what actually fades or peels a cheap marker after a season outdoors. UV printing looks fantastic on day one but degrades faster than enamel without a clear topcoat.
Magnet strength matters more than most golfers expect. Consumer hat-clip magnets vary widely in rated pull force, and a heavier custom marker, especially one built up with thick epoxy or a dense metal, can exceed what a standard clip magnet is designed to hold. Match the marker’s weight to the clip’s rated capacity before trusting it on the course.
Functional Design Constraints and Compatibility Checklist
A marker that looks great on your desk but fails on the green defeats the purpose. Size, weight, and edge finish all affect how well it actually performs during a round.
Most custom markers stay close to 1 inch in diameter and under roughly 2 inches if any decorative tab or line extends beyond the disc, which lines up with the sizing golfers generally follow to keep the piece flat, low-profile, and easy to place precisely. Smooth every edge before use. A rough-cut bottle cap or an un-sanded resin edge can nick the green’s surface when set down or picked up repeatedly.
- Keep diameter near 1 inch; avoid anything that sits proud of the turf
- Sand or file sharp edges smooth before the marker ever touches a green
- Add a high-contrast dot, arrow, or etched line if you want an alignment reference
- Test magnetic markers against your hat clip’s actual rated capacity, not just a quick tug
- Confirm the finish is fully cured or dried before the first round of use
High-contrast graphics or a simple etched line are worth adding if you play in low light or with a group that’s slow to spot a small marker from standing height, since it speeds up everyone’s read on the green.
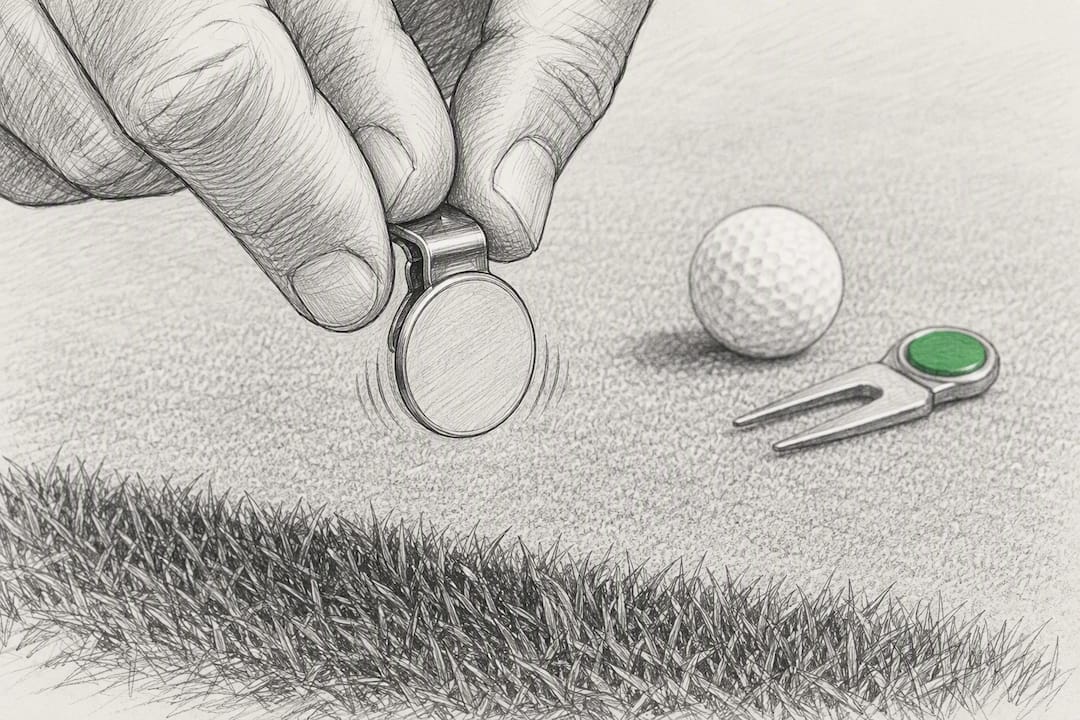
Pro Tip: Before trusting a heavy resin or metal marker to a magnetic hat clip, hold the assembled piece upside down and give it a firm shake. If it drops, the clip’s magnet isn’t rated for that weight.
Occasions, Gift Ideas, and Packaging Suggestions
Custom markers punch above their size as gifts because they’re personal, useful, and cheap enough to order in bulk without blowing a budget.
Weddings favor markers stamped with the couple’s initials and date, often handed out as favors to golfing guests. Corporate events lean on logo markers as branded swag, frequently paired with other custom logo accessories for a cohesive giveaway. Tournament organizers order matching sets for participant gifts, and milestone rounds, a first hole-in-one, a retirement, a father-daughter round, are common excuses for a one-off commemorative piece.
- Small magnetic gift boxes for a premium unboxing feel
- Velvet drawstring pouches for a softer, more personal presentation
- Branded card inserts explaining the design or the occasion it marks
- Bulk personalization (names, dates, logos) for wedding or tournament runs
If you’re ordering for an event, brief your supplier early. Confirm the exact date needed, the artwork format, and whether packaging is included or ordered separately, since bulk and wholesale runs often carry longer lead times than a single novelty piece.
Are Custom Ball Markers Legal to Use in Golf?
Yes. Under the Rules of Golf, any artificial object can mark a ball’s position, provided it isn’t used to help with alignment beyond simply marking the spot. That covers coins, poker chips, resin markers, and even a standard tee, all of which are legal choices as long as the object itself doesn’t double as an alignment aid.
- A flat, low-profile marker is always the safer choice over anything with height or a raised edge
- Never dig or scrape the green when placing or lifting a marker
- If your marker shifts or goes missing mid-round, replace it with any small object rather than delaying play
- Place and lift markers quickly; fumbling for a tiny coin in a pocket slows the group behind you
- Skip anything with an arrow or line explicitly designed to assist your putting alignment, since that crosses into equipment that isn’t allowed
Etiquette matters as much as the letter of the rule here. A marker you can find, place, and pick up in two seconds keeps the group moving, which is worth more on a Saturday morning tee sheet than any amount of glitter epoxy.
Why Magnetic Compatibility Changes How You Design a Marker
Most marker guides treat design as a purely visual exercise: pick a color, pick a shape, done. That’s incomplete. A marker that integrates with a magnetic system on your glove, hat clip, or towel setup actually changes how you play, because you’re not digging through a pocket or fumbling with a divot tool while your group waits.
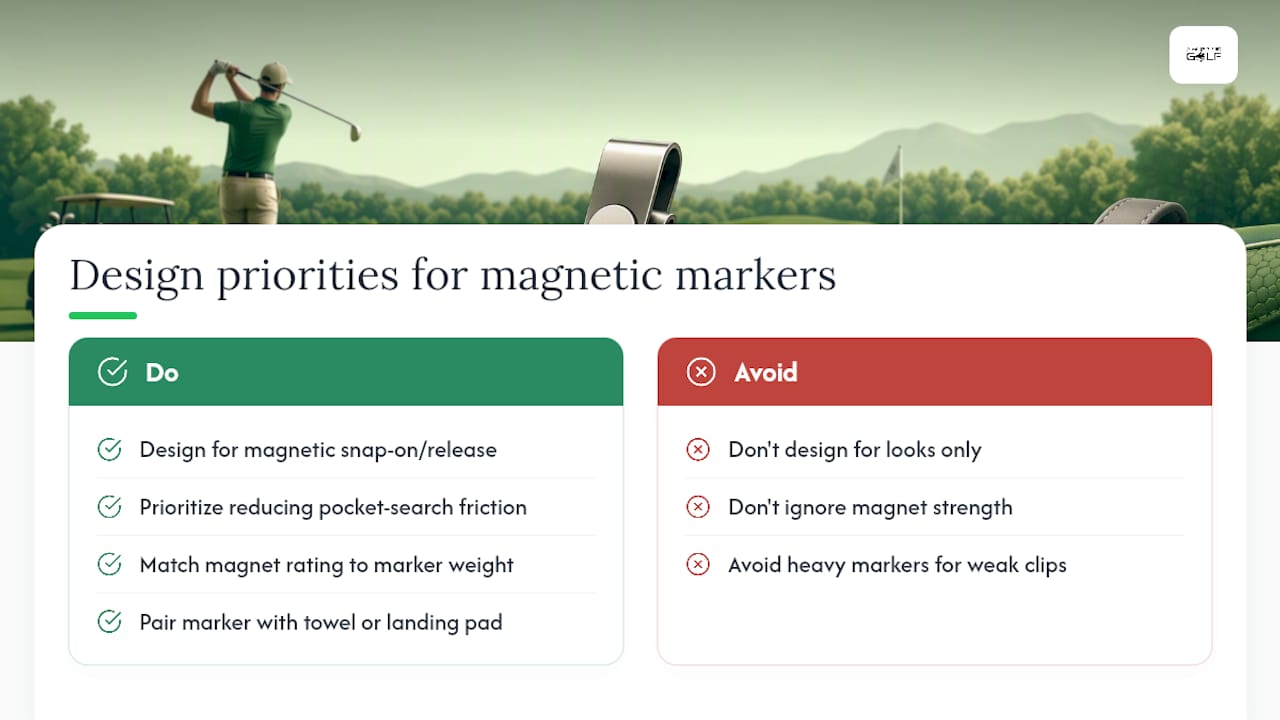
Product priorities start from that friction point rather than from aesthetics alone. A marker that snaps cleanly onto a magnetic landing pad or hat clip and releases just as easily saves real seconds per hole, and those seconds add up across eighteen holes and a full group. That’s the same thinking behind pairing a marker with a magnetic towel and landing pad system or a foldable divot tool: the goal is fewer searched pockets, not just a nicer-looking coin.
Durability and magnet rating deserve more attention than they get in most marker discussions. A gorgeous resin-inlay marker that’s too heavy for its clip’s magnet is a design failure disguised as a design win.
— Gary
Get a Custom Marker That’s Built for the Course, Not Just the Desk
Aiming Fluid Golf designs accessories around one problem competitors mostly ignore: fumbling costs you time and focus mid-round. If you’re weighing a custom marker, pair it with a system built to hold and release it fast rather than treating it as a standalone trinket.

Start by checking marker weight against your hat clip or towel system’s actual magnet rating before you order anything heavy or resin-coated, since a mismatch is the most common reason a great-looking marker gets left in a drawer. The magnetic towel and landing pad system is a practical starting point if you want your marker, towel, and divot tool all working from the same magnetic base instead of scattered across your bag. Browse the full best golf accessories guide to see how markers fit into a complete on-course setup, and place your first order when you’re ready to stop searching your pockets between shots.
Sources
The Rules of Golf from the USGA is the definitive word on what qualifies as a legal marker, tees included. For process comparisons like soft enamel versus die-struck, GS-JJ’s custom marker page breaks down manufacturing options clearly. For DIY builders, AceGolf’s marker tutorial covers sealing and finishing techniques that hold up to real course wear, and AceBallMarkers’ idea roundup is a solid source for design inspiration beyond the standard coin.
- Custom Ball Markers No Min | Free Design + Free Delivery — GS-JJ
- DIY Golf Ball Marker: Create Your Custom Course Accessory In Minutes — AceGolf
- Golfballs


